Save
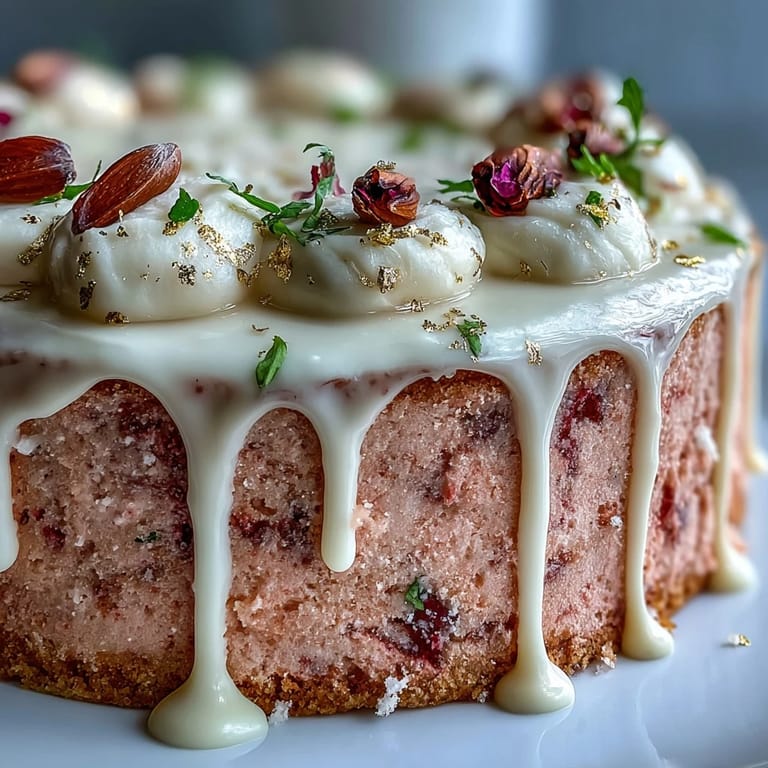
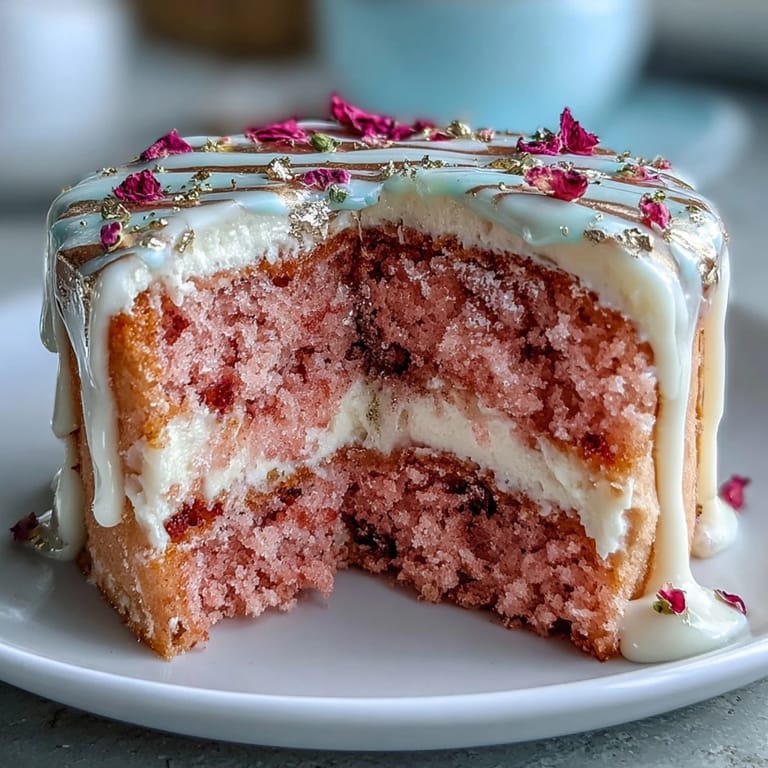
Save The scent of rosé hit me first, a sweet surprise when I opened the oven door. I hadn't imagined wine would mingle so easily with cocoa and flour until trying out this pretty velvet cake for a friend's bridal shower. One of those afternoons where everyone is bustling around, giggling over flower arrangements, I found myself swirling pink food coloring into the batter—highly entertained by how it stained my fingertips. The gold drip was a daring last-minute decision, nudged on by a bridesmaid who insisted everything needed "a bit of sparkle". Honestly, by the time we sliced into it, there were gold flecks almost everywhere except the cake itself (eventually remedied!).
There was something unexpectedly calming about frosting this cake in a kitchen filled with distant laughter and the clink of glassware in the background. I remember nervously painting the melted white chocolate with gold, half convinced I was about to ruin all my effort, only for everyone to peek in and coo at the shimmering edges. Sometimes it's these playful experiments, made in the middle of chaos, that give you a recipe worth remembering.
Ingredients
- All-purpose flour: Gives structure and a soft crumb—be sure to measure carefully and fluff the flour first for a lighter cake.
- Granulated sugar: Adds just the right amount of sweetness and helps the cake brown beautifully.
- Baking soda & baking powder: I learned not to skip either—these ensure a tender rise, which is especially key in a layered cake.
- Salt: A pinch wakes up all the other flavors—never underestimate it.
- Unsweetened cocoa powder: Only a bit, lending a delicate chocolate undertone and that signature velvet hue.
- Unsalted butter: Softened butter beats up fluffy—don't rush this step if you want a melt-in-your-mouth slice.
- Buttermilk: Room temperature gives the best texture, promise—cold buttermilk can make your batter curdle.
- Rosé wine: The quiet star—pick a fruity, not-too-dry bottle for the prettiest flavor.
- Eggs: Also at room temperature so everything blends smoothly, no curdling.
- Vanilla extract: Rounds out the flavors and makes everything feel just a little fancier.
- White vinegar: It reacts with baking soda and cocoa for that velvet crumb (and no, you won't taste it).
- Pink food coloring gel: Adds that blush color—a little goes a long way, so start tiny.
- Cream cheese: For a tangy, luxe frosting; let it soften for the dreamiest texture.
- Powdered sugar: Sift it—just trust me, no one wants lumpy frosting.
- Heavy cream: Helps the white chocolate drip flow beautifully (not too stiff, not too runny).
- White chocolate chips: Melted gently, they set as a glossy drip and pair well with gold.
- Edible gold luster dust & vodka (or clear extract): Turns the drip into a true celebration; only a dab needed.
Tired of Takeout? 🥡
Get 10 meals you can make faster than delivery arrives. Seriously.
One email. No spam. Unsubscribe anytime.
Instructions
- Prep the Cake Pans:
- Line each pan neatly with parchment paper and a dab of butter so those pink layers pop right out—no sticking nightmares here.
- Mix Dry Ingredients:
- As you sift, notice how the cocoa dust floats in the bowl; it helps everything blend evenly and trust me, prevents lumps.
- Cream Butter and Sugar:
- Beat until pale and fluffy, scraping the bowl sides—the mixture should smell rich and slightly sweet, almost like light caramel.
- Add Eggs and Vanilla:
- Crack eggs one at a time, letting each one fully combine, then stir in vanilla until the batter glistens and thickens.
- Combine Wet Ingredients:
- Pour in buttermilk, rosé, and vinegar; the mix may look odd but it magically smooths out after a gentle whisk.
- Mix in Dry Ingredients:
- Gradually add dry mix to wet, stirring just until you see no streaks—overmixing leads to dense cake, so go slow.
- Color the Batter:
- Dot in pink food gel, swirling until you get that perfect blush hue—pause and admire how it transforms.
- Bake the Layers:
- Spoon batter evenly into pans, bake until a toothpick comes out clean, and let the kitchen fill with that soft rosé and cocoa aroma.
- Cool the Cakes:
- Give them just ten minutes in the pans, then tip gently onto racks—fully cool before you even think about frosting.
- Make the Frosting:
- Whip butter and cream cheese until fluffy, slowly add sugar, then blend in rosé, vanilla, and a pinch of salt until it beckons you to taste.
- Assemble the Layers:
- Trim any domed tops, stack with generous sweeps of frosting between each, and give the whole cake a thin crumb coat before chilling.
- Add Final Frosting:
- Once chilled, finish with a swirl of the remaining frosting—let imperfections add character.
- Make the Gold Drip:
- Melt white chocolate with cream, stirring until glossy; let it cool before spooning along the cake edge so it drips slowly and doesn't melt the frosting.
- Paint Gold:
- Mix luster dust with vodka, then gently brush onto drips—stand back and admire that glint when it catches the light.
- Chill and Serve:
- Set cake in the fridge at least half an hour; this helps every slice hold its pretty layers when you cut.
 Save
Save The cake almost stole the show—the bride laughed when she cut into the soft pink layers, and guests were whispering, trying to guess the secret ingredient. There's something joyful about serving a dessert that glimmers as much as the occasion itself.
Making Your Frosting Look Professional (Without Stress)
An offset spatula is my favorite trick—it glides frosting so smoothly that even the wobbliest hand can fake a pro finish. If crumbs sneak into your frosting, just scrape them off and chill the cake before the final coat; no need to panic or start over.
Choosing Edible Decorations That Pop
I once used violets from the backyard (washed carefully) to decorate, and they held up surprisingly well alongside the gold drip. Berries work too—they add a juicy burst and a dramatic look, especially on special-occasion tables.
Troubleshooting Your Cake Layers
If your layers dome or crack, don't fret—leveling with a bread knife fixes everything, plus you get to taste the scraps as you work. Sometimes, a chilled cake carves and frosts better anyway, and imperfections hide under swirls and sprinkles.
- Stuck pans? Run a knife along the edge before turning out.
- Layer edges too crispy? Trim and taste as you go.
- Forgot the gold drip? Dust the top with powdered sugar for a quick fix.
 Save
Save Make this cake when you want to celebrate someone special—or just to bring smiles to an ordinary afternoon. Either way, each slice brings a little sparkle to your day.
Recipe FAQs
- → How can I boost the rosé flavor without making the batter too wet?
Brush baked and cooled layers lightly with reserved rosé to concentrate flavor rather than adding extra liquid to the batter. You can also fold a tablespoon of reduced rosé into the frosting for a pronounced note without altering crumb structure.
- → What's the best nonalcoholic substitute for rosé?
Use sparkling grape juice or a concentrated grape reduction for a similar fruity note. Reduce the liquid slightly elsewhere in the batter or add an extra tablespoon of buttermilk to keep texture balanced.
- → How do I achieve an even blush color throughout the layers?
Use a gel food coloring and add it gradually to the batter until the desired tone appears. Gel gives more vibrant color with less liquid, keeping the batter consistency steady and bake times predictable.
- → What ensures a smooth, stable gold drip?
Heat white chocolate with cream until silky, then cool to room temperature so it thickens slightly before dripping. Apply a modest drip and chill to set. Mix gold luster dust with a small amount of vodka or clear extract and paint once the drip is set for a clean metallic finish.
- → How should I store leftovers to preserve texture and shine?
Store covered in the refrigerator for up to 3 days to keep the cream cheese frosting firm. Bring slices to room temperature for 20–30 minutes before serving to soften the crumb and revive flavor.
- → Can layers be baked ahead or frozen?
Yes. Cool layers completely, wrap tightly in plastic, then freeze for up to one month. Thaw overnight in the refrigerator before leveling and assembling to maintain structure and moisture.